언리얼의 Input 시스템

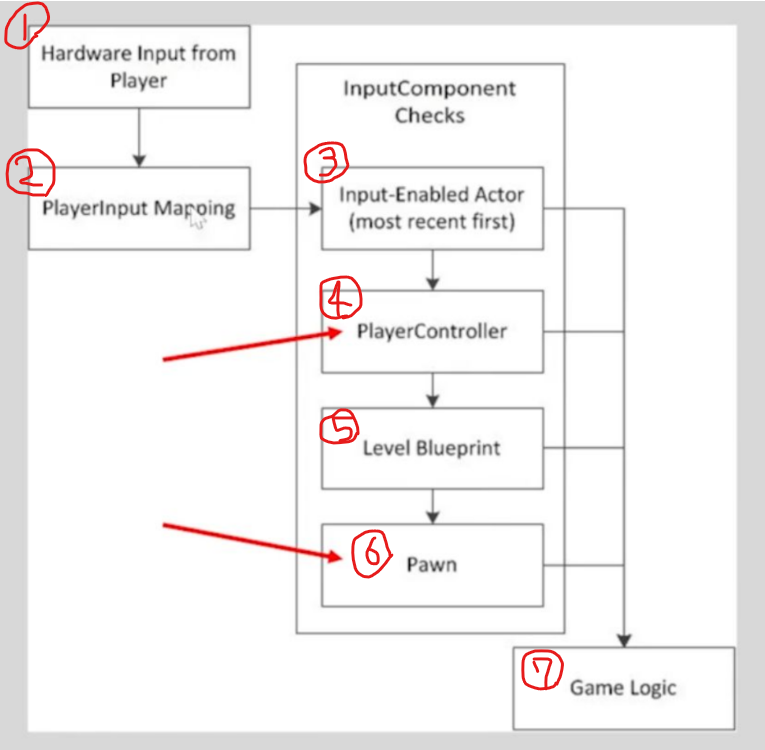
1. 유저가 하드웨어(키보드, 마우스, 패드 등)을 동작시킴.
2. 유저의 인풋과 데이터를 매핑.
3. 인풋 컴포넌트가 제일먼저 인풋 처리가 가능한 액터 확인.
4. 그다음 PlayerController 확인.
5. 레벨 블루프린트 확인.
6. 플레이어가 빙의한 Pawn 확인
7. 위의 3~6 과정을 통해 처리된 인풋을 게임 로직에 반영.
입력을 어디서 처리할 것인가?
PlayerInput값은 위에서 설명했던 것처럼 크게 4가지 과정에서 처리 가능합니다.
1. Input 처리가 가능한 Actor
2. PlayerController
3. Level Blueprint
4. Player가 빙의한 Pawn
기존 언리얼 프로젝트 작업들은 모두 PlayerController에서 입력을 처리해주었는데, 선배님 말씀에 의하면 Pawn에서 처리하는 것이 가장 바람직하다고 합니다. 그 이유는 Pawn이 여러명이 될 수 있는 경우에도 유연하게 대처할 수 있고, 코드가 분산되기 때문에 각각 Pawn의 입력이나 동작을 개별적으로 정의할 수 있어 확장성이 높아지기 때문입니다.
Enhanced Input 이란?
언리얼4와 다르게 5버전에는 Enhanced Input(향상된 입력 시스템) 이라는 시스템이 정식 도입되었는데, 유저의 Input 설정 변경에 유연하게 대처할 수 있고, 각 설정을 독립적인 에셋으로 만드는 시스템입니다. 오늘은 이를 활용해 입력 시스템의 초안을 작성했습니다.
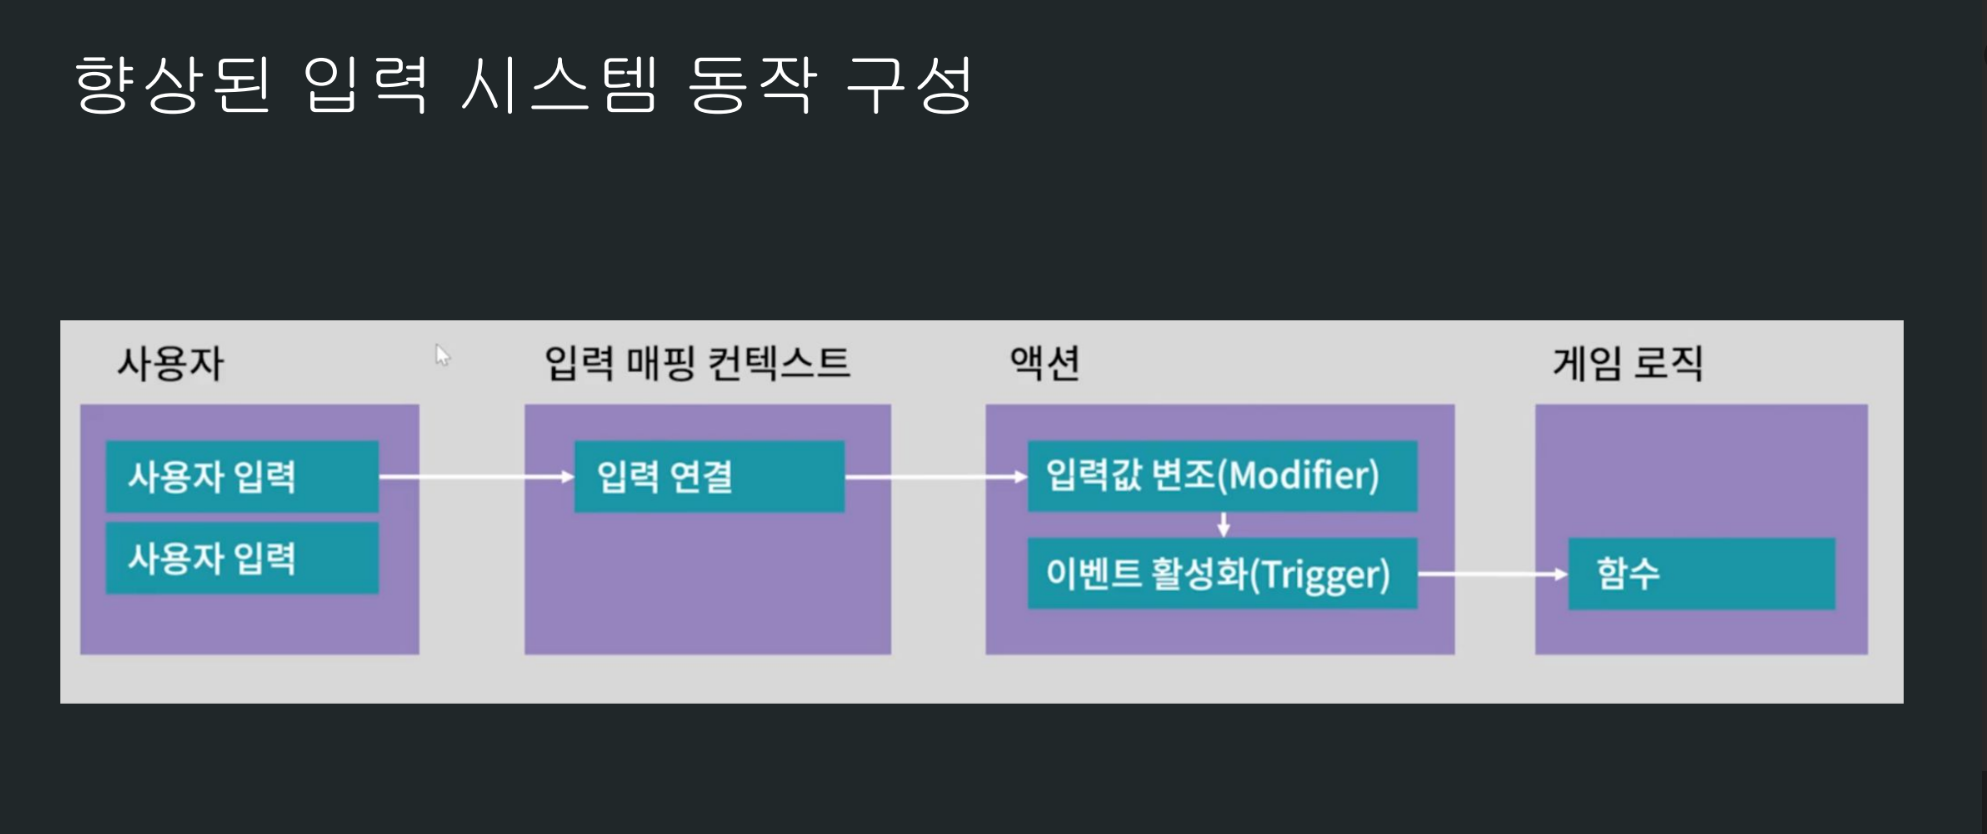
먼저 Enhanced Input의 동작은 네 단계로 세분화되는데 내용은 다음과 같습니다.

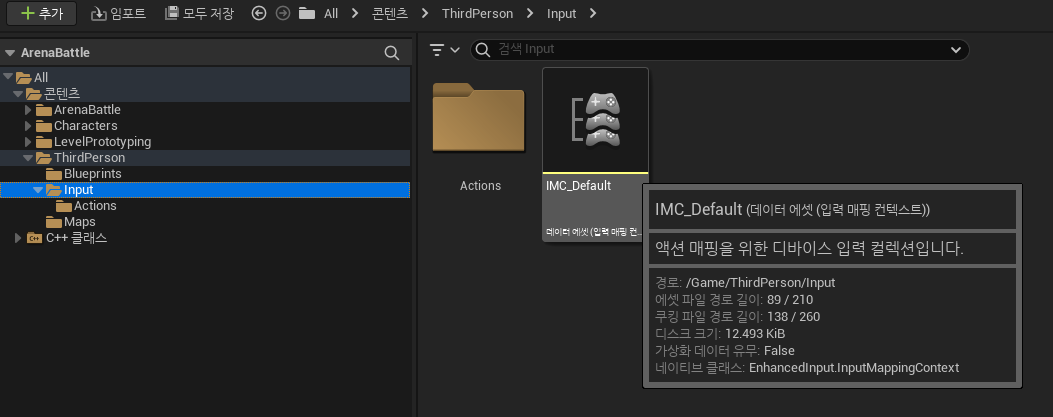
두번째 와 세번째 단계에 있는 입력 매핑 컨텍스트(Input Mapping Context)와 액션(Input Action)을 묶어서 하나의 에셋으로 만들 수 있습니다.


예제
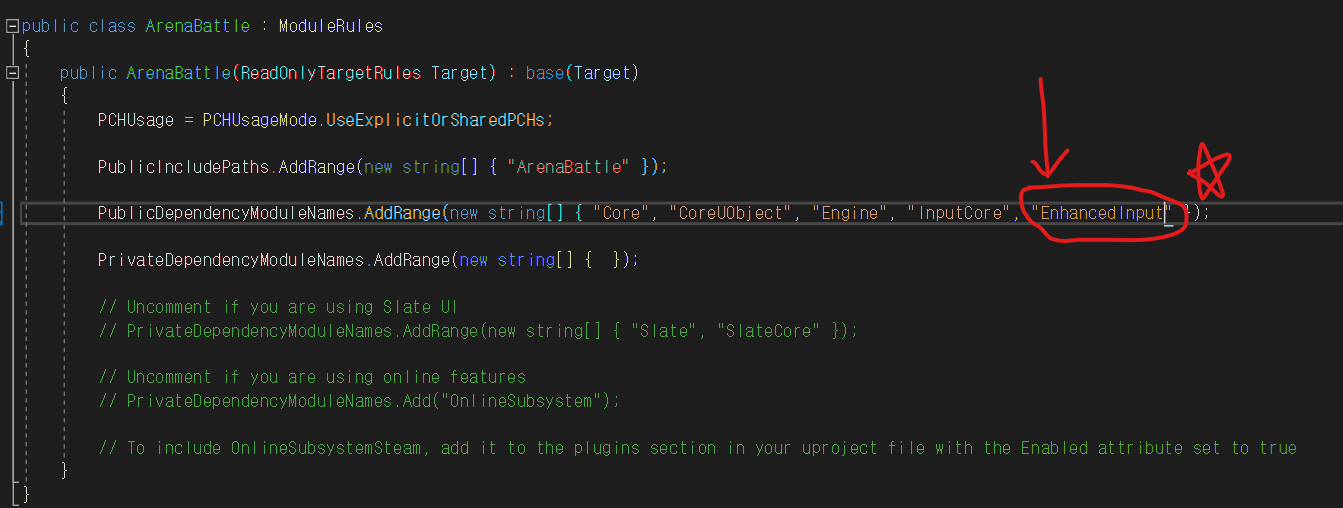
코드 작성에 앞서, Enhanced Input 모듈을 추가한다.

<플레이어 코드>
// Fill out your copyright notice in the Description page of Project Settings.


#include "Character/ABCharacterPlayer.h"
#include "GameFramework/SpringArmComponent.h"
#include "Camera/CameraComponent.h"
#include "EnhancedInputComponent.h"
#include "EnhancedInputSubsystems.h"

AABCharacterPlayer::AABCharacterPlayer()
{
	// Camera
	CameraBoom = CreateDefaultSubobject<USpringArmComponent>(TEXT("CameraBoom"));
	CameraBoom->SetupAttachment(RootComponent);
	CameraBoom->TargetArmLength = 400.0f;
	CameraBoom->bUsePawnControlRotation = true;

	Camera = CreateDefaultSubobject<UCameraComponent>(TEXT("Camera"));
	Camera->SetupAttachment(CameraBoom, USpringArmComponent::SocketName);
	Camera->bUsePawnControlRotation = false;

	//Input
	static ConstructorHelpers::FObjectFinder<UInputMappingContext> InputMappingContextRef(TEXT(""));
	if (InputMappingContextRef.Object)
	{
		DefaultMappingContext = InputMappingContextRef.Object;
	}


	static ConstructorHelpers::FObjectFinder<UInputAction> InputActionJumpRef(TEXT(""));
	if (InputActionJumpRef.Object)
	{
		JumpAction = InputActionJumpRef.Object;
	}

	static ConstructorHelpers::FObjectFinder<UInputAction> InputActionMoveRef(TEXT(""));
	if (InputActionMoveRef.Object)
	{
		MoveAction = InputActionMoveRef.Object;
	}

	static ConstructorHelpers::FObjectFinder<UInputAction> InputActionLookRef(TEXT(""));
	if (InputActionLookRef.Object)
	{
		LookAction = InputActionLookRef.Object;
	}

}

void AABCharacterPlayer::Move(const FInputActionValue& Value)
{
	//템플릿이라 꺽쇠구나! 주말동안 코드 분석.
	FVector2D MovementVector = Value.Get<FVector2D>();

	const FRotator Rotation = Controller->GetControlRotation();
	const FRotator YawRotation(0, Rotation.Yaw, 0);

	const FVector ForwardDirection = FRotationMatrix(YawRotation).GetUnitAxis(EAxis::X);
	const FVector RightDirection = FRotationMatrix(YawRotation).GetUnitAxis(EAxis::Y);

	AddMovementInput(ForwardDirection, MovementVector.Y);
	AddMovementInput(RightDirection, MovementVector.X);
}

void AABCharacterPlayer::Look(const FInputActionValue& Value)
{
	FVector2D LookAxisVector = Value.Get<FVector2D>();

	AddControllerYawInput(LookAxisVector.X);
	AddControllerYawInput(LookAxisVector.Y);
}

void AABCharacterPlayer::SetupPlayerInputComponent(UInputComponent* PlayerInputComponent)
{
	Super::SetupPlayerInputComponent(PlayerInputComponent);

	//InputAction 과 InputMappingContext를 연결.
	UEnhancedInputComponent* EnhancedInputComponent = CastChecked<UEnhancedInputComponent>(PlayerInputComponent);

	//Jump
	EnhancedInputComponent->BindAction(JumpAction, ETriggerEvent::Triggered, this, &ACharacter::Jump);
	EnhancedInputComponent->BindAction(JumpAction, ETriggerEvent::Completed, this, &ACharacter::StopJumping);

	//Move
	EnhancedInputComponent->BindAction(JumpAction, ETriggerEvent::Triggered, this, &AABCharacterPlayer::Move);

	//Look
	EnhancedInputComponent->BindAction(JumpAction, ETriggerEvent::Triggered, this, &AABCharacterPlayer::Look);
}
<플레이어 헤더>
// Fill out your copyright notice in the Description page of Project Settings.

#pragma once

#include "CoreMinimal.h"
#include "Character/ABCharacterBase.h"
#include "InputActionValue.h"
#include "ABCharacterPlayer.generated.h"

/**
 *
 */
UCLASS()
class ARENABATTLE_API AABCharacterPlayer : public AABCharacterBase
{
	GENERATED_BODY()

public:
	AABCharacterPlayer();

protected:
	UPROPERTY(VisibleAnywhere, BlueprintReadOnly, Category = Camera, Meta = (AllowPrivateAccess = "true"))
	TObjectPtr<class USpringArmComponent> CameraBoom;

	UPROPERTY(VisibleAnywhere, BlueprintReadOnly, Category = Camera, Meta = (AllowPrivateAccess = "true"))
	TObjectPtr<class UCameraComponent> Camera;


//Input Section
protected:
	UPROPERTY(EditAnywhere, BlueprintReadOnly, Category = Input, Meta = (AllowPrivateAccess = "true"))
	TObjectPtr<class UInputMappingContext> DefaultMappingContext;//늘리고싶으면 아래에 또하나 만들면됌.

	UPROPERTY(EditAnywhere, BlueprintReadOnly, Category = Input, Meta = (AllowPrivateAccess = "true"))
	TObjectPtr<class UInputAction> JumpAction;

	UPROPERTY(EditAnywhere, BlueprintReadOnly, Category = Input, Meta = (AllowPrivateAccess = "true"))
	TObjectPtr<class UInputAction> MoveAction;

	UPROPERTY(EditAnywhere, BlueprintReadOnly, Category = Input, Meta = (AllowPrivateAccess = "true"))
	TObjectPtr<class UInputAction> LookAction;

	void Move(const FInputActionValue& Value);
	void Look(const FInputActionValue& Value);

public:
	virtual void SetupPlayerInputComponent(class UInputComponent* PlayerInputComponent) override;
};'UE5' 카테고리의 다른 글
| [UE5] UProject 파일이 제대로 실행되지 않을 때 해결법 (0) | 2023.07.07 |
|---|---|
| [UE5] 언리얼의 핫리로드와 라이브코딩에 대하여 (0) | 2023.07.07 |